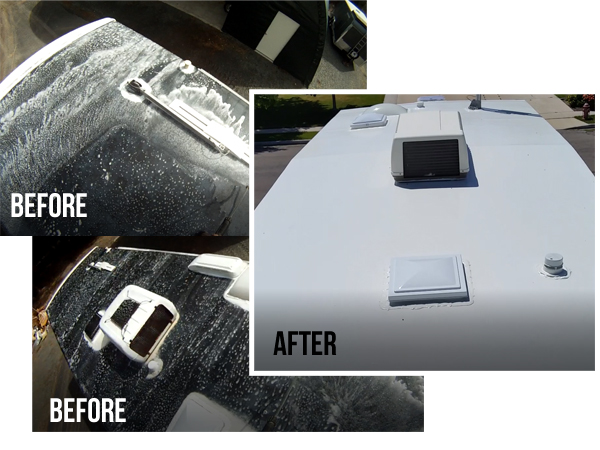
Wouldn’t it be great if everything that we invested in lasted forever, if nothing ever had to be repaired? Of course it would, but in the real world, regular maintenance and repair of our possessions is an essential part of ensuring that they are always available and working properly. Whether you purchased your RV new or used, it is an investment in yourself, in your relaxation and leisure time. You inspect your coach and perform routine maintenance before and after each season so that it will be ready for you whenever you’re ready for it. One of the most important areas of your RV to maintain is the roof, because it takes the most punishment and can be the most expensive thing to replace if left unattended. This year, you have noticed some minor cracks in the roof and have decided to head off disaster by performing an RV roof repair coating.

What Product to Use When Performing an RV Roof Coating Repair
There are a lot of RV roof repair-and-seal products on the market, all making different claims regarding their ease of application and durability. Choosing the product that is right for you can seem overwhelming. The first thing that you will need to consider is the composition of your RV roof. Chances are your coach roof is made of metal, asphalt or EPDM synthetic rubber. The smartest approach is to choose a coating that will work equally well on any of those surfaces; most EPDM rubber coatings fall into this category. Many of them can also be used on asphalt roofs, if the appropriate primer is applied first. Also, an EPDM rubber coating that is a liquid is excellent for filling in and coating tiny cracks and imperfections in the roof’s surface. You’ve decided that a liquid EPDM coating is ideal for performing an RV roof coating repair. Now it’s time to choose one.
Which Liquid EPDM Coating is the Right One for You?
Even after deciding to go with a liquid rubber coating, there are still some things to consider. Performing an RV roof coating repair requires quite a bit of prep work to ensure that the coating will adhere well and last for years. A poorly prepared roof surface is a formula for disaster. You’ll need to thoroughly inspect and wash the surface, being certain to remove all mildew and dirt. Any necessary repairs to the caulking or surface structure will need to be made as you go. If it rains while you’re working, you’ll need to allow time for the surface to thoroughly dry before applying the coating. Some liquid coatings require two coats, with hours of drying time between each, to achieve a satisfactory result. What happens if it starts to rain in between coats? As you can see, performing an RV roof coating repair, while not difficult, can be time-consuming when done properly. Choosing a product that goes on as a liquid and effectively covers the surface in one coat will save you a lot of money and hours of time. Another nice feature of this product is that it becomes water proof the moment that it touches the roof’s surface, so your efforts won’t be wasted if it does start to rain.
If an RV roof coating repair is a part of this year’s RV maintenance plan, you’ll want to consider all of the factors, cost, durability, ease of use and time required, when deciding which product will best fit your needs. Whichever one you choose, Happy Camping!


