
You know exactly what that sound is before you even look up. It’s a rainy Tuesday afternoon, you’re just trying to get some work done, and there it is: drip, drip, drip.
You look up at the ceiling and see that awful, expanding brown ring. Whether you own a commercial garage, manage an office building, or have a flat roof over your back patio, finding a leak feels like a punch to the gut. Because a roof leak is never just a little water, it’s ruined insulation, rotting structural wood, and a dark, damp playground for black Mould to take over.
Naturally, the first thing most of us do is panic. You grab a bucket, put it on the floor, and start dreading the phone calls you have to make. Tearing off a flat roof and paying a commercial crew to replace it from scratch is obnoxiously expensive. It means dumpsters sitting in your parking lot, loud demolition noise for a week, and a bill that could easily eat up your entire maintenance budget for the year.
But hold off on calling those contractors for a second. There is actually a way out of this without emptying your bank account. You can handle this yourself, and honestly? You don’t need to be a professional roofer to do a permanent roof repair. You need to understand why the roof is failing and use the right stuff to fix it.
Why Your Current Roof is Failing
If you’ve got a traditional rubber roof up there, it was probably installed in massive sheets. The rubber itself? It’s pretty tough stuff. But the system has one massive, fatal flaw: the seams.
Every few feet, those heavy black rubber sheets overlap, and whoever installed them just glued them together – fast forward a few years. The blazing summer sun has been baking that adhesive relentlessly. Your building naturally settles and shifts with the ground. Slowly but surely, those glued seams start to pull apart.
Once a gap opens up – even one so small you can barely see it – water finds a way in. And if you live anywhere that gets cold, it gets worse. That trapped water freezes at night, expands as ice, and literally pries those seams wider. By the time you notice the drip inside, the roof has probably been open to the elements for months.
The Hardware Store Trap
When water is actively dripping onto your floor, it is incredibly tempting to drive down to the local hardware store, grab whatever $40 bucket of sealant is sitting on the shelf, and slap it on the leak. I totally get it. It’s cheap, it’s right there, and you’re desperate.
But please, save your money. Here’s the ugly truth about 90% of those off – the – shelf, water – based elastomeric and acrylic sealants: they are basically just really thick paint.
Because they are water – based, they don’t actually bond to the rubber underneath. They sit on top of it. When winter rolls around and the temperature drops, that cheap acrylic turns stiff and brittle. Your building shifts, the coating snaps like a twig, and you’re leaking again.
Even worse is what happens when it rains. Flat roofs are notorious for having low spots where water sits for days. Roofers call this “ponding water.” Those cheap acrylics literally cannot handle sitting in a puddle. They remulsify, which is a fancy way of saying they turn back into a liquid and wash right off your roof and down the gutter.
You might get a few years out of them if you’re lucky, but then you’re right back up on a ladder doing the whole job over again.
The Permanent Fix: Liquid Butyl Rubber
If you want to stop the leak for good and actually add 18 to 20 years to your building’s life, you need to step away from water – based paint and use a specialized epdm coating – specifically, liquid butyl rubber.
This stuff is completely different. It’s a solvent – based formula, and when you roll it onto your roof, it triggers a chemical process called cross-linking. It doesn’t just dry on top of the old membrane; it chemically fuses into it at a molecular level.
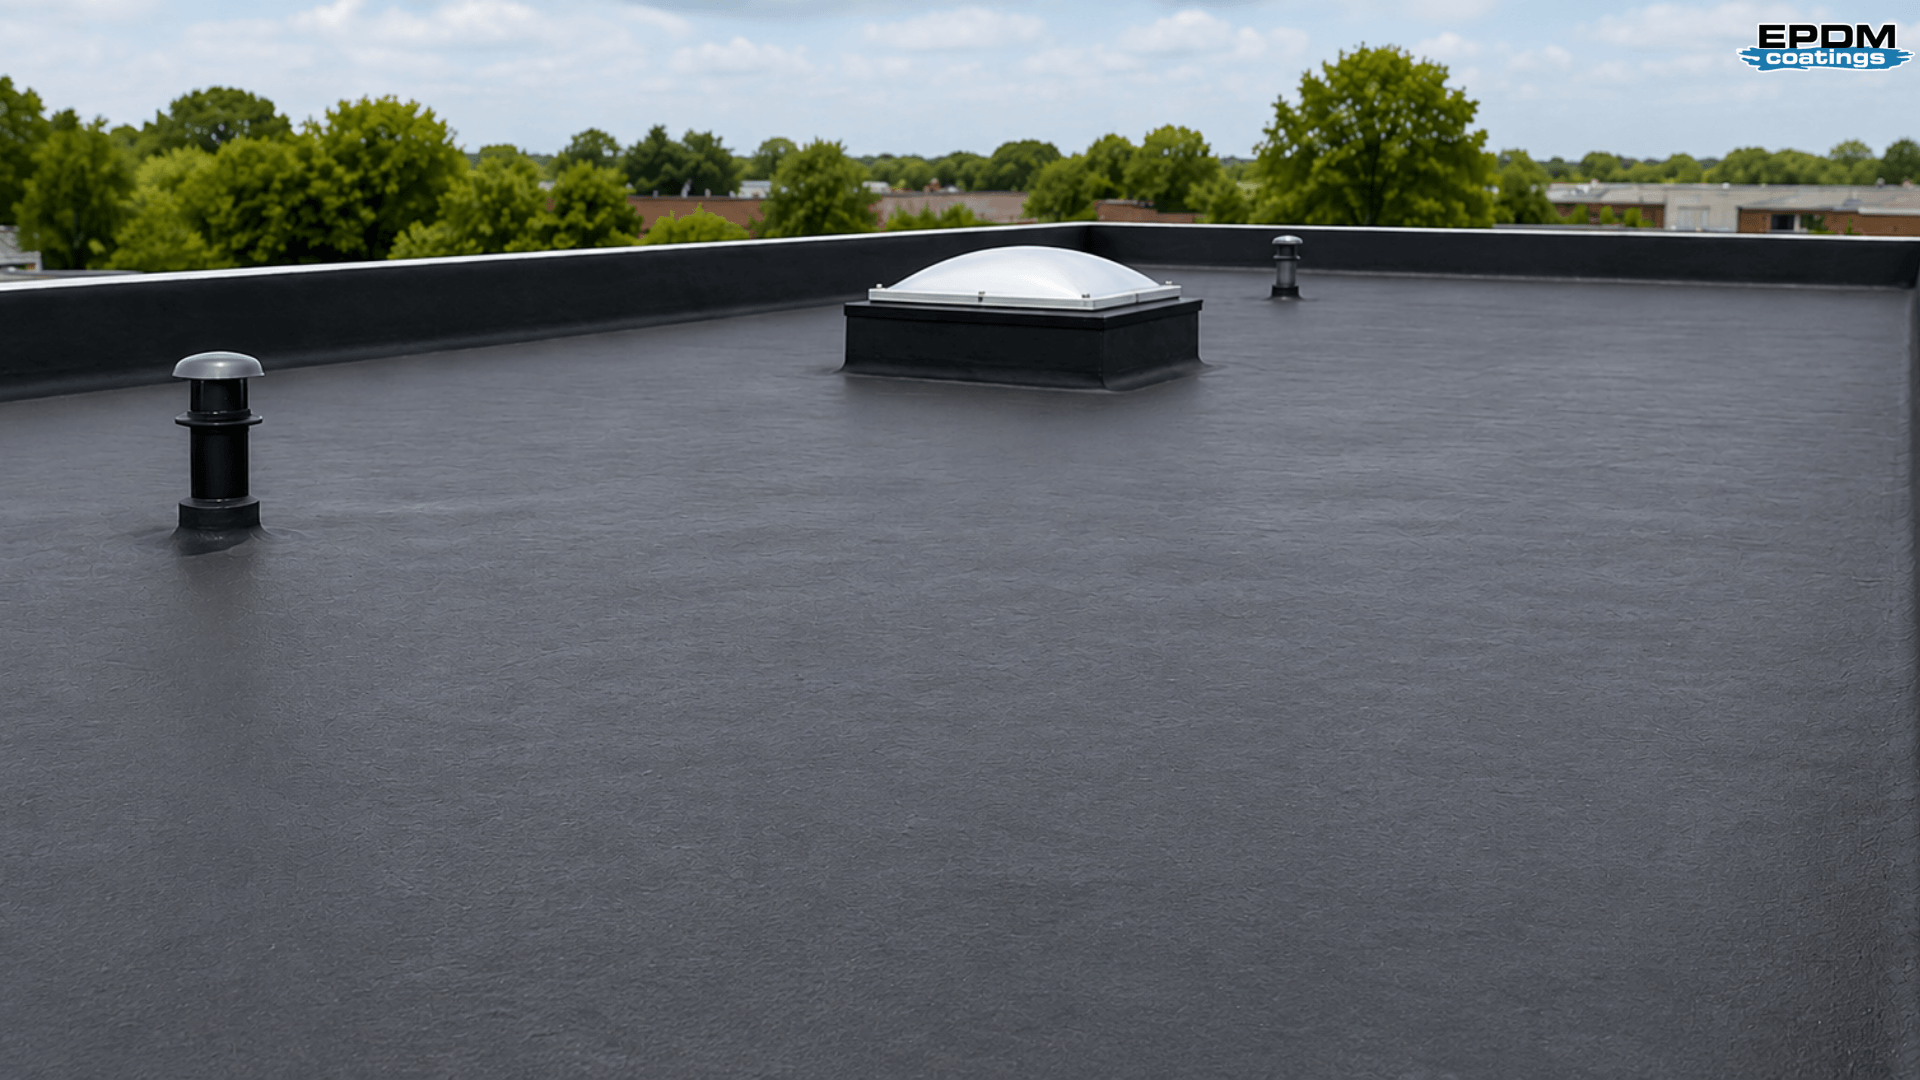
Once it cures, your old failing roof and the new liquid coating become one single, solid, seamless piece of rubber. No sheets. No overlaps. No glued edges waiting to pop open in the sun. If there are no seams, the water has nowhere to sneak in.
Ditching the Primer and the Three – Coat Hassle
If you’ve ever looked into DIY roof coatings, you’ve probably seen instructions that read like a nightmare. Wash it, wait a day. Apply a primer, wait a day. Apply a base coat, wait a day. Apply a top coat… You get the idea. It ruins your entire week.
With an advanced epdm roof coating, you can toss all those complicated steps in the trash. It’s a true one – coat system. You put it down exactly once, and you instantly get a thick, heavy – duty protective barrier.
And for most jobs, you don’t even need a primer. You can roll it directly over fiberglass, weathered galvanized metal, concrete, built – up roofing, and even old TPO (as long as it’s a few years old and the stringy core isn’t showing). You can even paint it right over those cheap acrylics the last guy tried to use. (The only real exceptions are PVC roofs and 100% silicone, which it won’t stick to. Skipping that primer step is a massive time saver.
Built for Brutal Weather
Mother Nature doesn’t care about your flat roof, but this stuff is formulated to take a beating. It stretches up to 500%, so as your building expands in the summer heat and contracts in the winter cold, the rubber stretches with it instead of tearing. It won’t melt in 250°F heat, and it stays totally flexible all the way down to – 40°F.
Remember that ponding water we talked about? Liquid Butyl Rubber actually thrives in it. It can sit submerged under standing water 365 days a year without breaking down. People literally use it to line industrial cooling towers. It also has a built – in mildewcide, so you don’t have to worry about algae or mould turning your roof green.
And if you’re trying to squeeze this project in during the late fall, you’re in luck. Because it’s solvent – based, a sudden overnight freeze won’t ruin the wet coating. The curing process hits pause, goes dormant for the night, and picks right back up the next morning when the sun hits it. And as long as it’s over 50 degrees outside, it becomes totally waterproof in just 2 to 3 hours. If an unexpected afternoon shower rolls in, your hard work isn’t going to wash away.
How to Do It Right
You don’t need a truck full of heavy equipment. Here is the straightforward, no – nonsense way to get it done.
1. Scrub It Down
I cannot overstate this: the roof has to be completely clean. If it’s greasy, dirty, or chalky, the rubber won’t stick. Grab a power washer and a heavy – duty cleaner designed for roofing, such as roof protect. Wash away all the oil, grime, and Mould. Once it’s clean, let it dry completely. Don’t rush it. The surface needs to be bone dry before you start.
2. Patch the Weak Spots
Before you coat the whole massive flat area, check the obvious trouble spots. Look at the seams around your AC units, skylights, and pipes. If you see wide gaps or torn flashing, you need to bridge them. Take a product like Seam Tight, brush down a heavy layer, push some reinforcing poly fabric into it, and let it set up. This creates an armour-plated seal over the worst areas. You’ll coat right over it the next day.
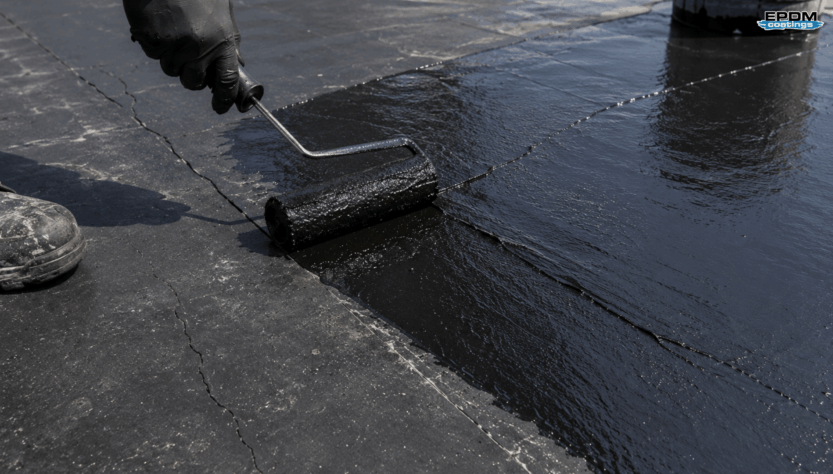
3. Mix and Roll
There are no complicated two – part chemicals to measure. Just grab a heavy – duty drill with a paddle mixer attachment, stick it in the bucket, and mix it for a few minutes to activate it.
If you’re doing a sizable roof on a house or a commercial garage, do yourself a favour and buy a roof coating 5 gallon pail. It’s way more efficient and covers about 250 square feet on a smooth surface.
Pour it out and spread it using a standard 3/8 – inch nap roller on a broom handle. It is totally self – leveling, so as it dries, the roller marks melt away into a smooth, professional – looking surface. If you don’t use it all, hammer the lid back on tight; it has a five-year shelf life.