
Let’s be honest: nobody actually wants to spend their weekend on a roof. But if you own a building with a flat roof, you know the drill. You see a water spot on the ceiling, or maybe you notice the black EPDM membrane starting to “alligator” and crack under the sun. At that point, you have two choices: ignore it until you’re forced to pay $15,000 for a total tear-off, or take a proactive afternoon to seal it up for the next two decades.
At EPDM Coatings, we’ve seen every DIY mistake in the book. That’s why we’ve narrowed down the restoration process to seven straightforward steps. If you use the right epdm roof sealant, you aren’t just “painting” your roof – you’re chemically fusing a new membrane to the old one.
Why Liquid Butyl Rubber Beats Standard Roof Coatings
Most off-the-shelf roof coatings are just thick acrylic paint. They sit on top of the roof, and the moment the temperature swings or water ponds, they start to peel like a bad sunburn. Our Liquid Butyl Rubber is different. It’s a true solvent-based rubber that forms molecular bonds. It handles standing water 365 days a year and stretches up to 500% without snapping.

Step 1: The “Detective” Phase – Inspecting for Leaks
Water is sneaky. A leak in your living room rarely means the hole is directly above it. Water loves to travel along rafters and insulation before it finally drips.
Grab a pair of boots and walk the perimeter. You’re looking for “fish-mouths” (open seams), loose flashing around chimneys, or cracked boots around PVC vents. If you see areas where water sits for more than two days after a rain, pay close attention – those are your primary targets for a heavy-duty epdm roof sealant application.
Step 2: Prep is 90% of the Job
You wouldn’t put a Band-Aid on a muddy knee, right? Your roof is the same. Adhesion is everything. Use a stiff broom to get the big stuff off, then hit it with a power washer or a scrub brush.
You need to get rid of the “chalk” – that black or grey dust that comes off on your fingers when you touch an old EPDM roof. If that dust stays, the coating won’t stick. Most importantly: Let it dry. Trapping moisture under your new roof coatings is a recipe for bubbles.
Step 3: Evict the “Bad” Materials (Silicone and Tar)
Here’s a hard rule: Liquid Rubber hates silicone. If a previous owner tried to patch a leak with silicone or fresh, oily roofing tar, you’ve got to scrape it off. Our products won’t bond to those unstable materials. Get down to the original membrane so the chemical cross-linking can actually happen.
Step 4: Detail Work (Don’t Skip This!)
Before you start pouring the main coating, do your “detail work.” Take a brush and go around every vent, skylight, and corner. Think of this like cutting in the corners of a room before you use the big roller on the walls.
If you have a gap wider than a nickel, use a compatible caulk or a bit of polyester mesh to bridge the gap. This “double-layering” on the weak spots is what truly extends the roof’s life.
Step 5: Mixing – Don’t Get Lazy Here
Our Liquid Butyl Rubber is a two-part system. You’ll get a small bottle of catalyst – that’s the secret sauce that makes it harden. Use a power drill with a mixing paddle. Don’t just stir it with a stick; you need to make sure that the catalyst is swirled into every bit of the rubber.
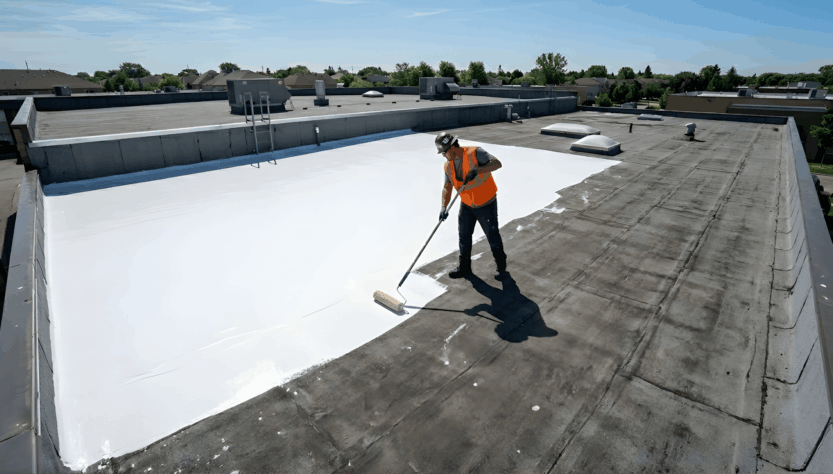
Step 6: The “Pour and Spread” Technique
This is the satisfying part. Instead of dipping a roller into a tray over and over, pour the epdm roof coatings directly onto the roof in a long “S” shape.
Use a squeegee to spread it out, then follow up with a medium-nap roller to even it out. You’re aiming for a thickness of about 20 mils – roughly the thickness of a heavy business card. On a smooth roof, one gallon usually covers 50 square feet. If your roof is really thirsty and porous, you might only get 40 square feet.
Step 7: Let the Chemistry Work
One of the best things about our system is that it’s waterproof almost immediately. A surprise rain shower two hours later won’t wash it away. However, it takes a few days to cure into its final “bulletproof” state fully.
If the sun is out and it’s above 50°F, you’re golden. The coating will self-level, smoothing out your roller marks and creating a seamless, white, reflective shield that keeps your building cooler and your deck dry.
The Bottom Line
Roofing doesn’t have to be a nightmare. By following these steps and using professional-grade roof sealant, you’re essentially “resetting the clock” on your roof for another 18 to 20 years.
Need to figure out how much product your specific roof needs? Head over to our site, and we’ll help you spec out the perfect kit for your project.